Monday, 15 February 2021

How to send correspondence in Pega

 Hi Friends, today we will see how to send correspondence in Pega.


Steps involved:

    Create a new email account(gmail)

    Make email as low security

    Configure email account rule

    Configure steps to send correspondence


Step1: Create a new email account

I am creating a new gmail account for test. 


Created new email account


Step 2: Make email as low security

Go to google account-> security -> Less Security app access -> Switch on.


Now my email account is less secure.


Step 3: Configure email account rule


Create a new email account rule

Rule Explorer -> Integration Resources -> Email account -> Create


In the email account rule, selected account provider as Google email, why means we have created that Gmail account for sending correspondence from Pega.

In Email address, UserID and Reply to provided the email id.

In Display Name, provide any name.

In Password, provide the gmail account password.


Use test connectivity to check whether email account configured without any issue or not.

In our case, overall result is good.

Step 4: steps to send correspondence


Save as getEmailSenderInfo activity into our ruleset version
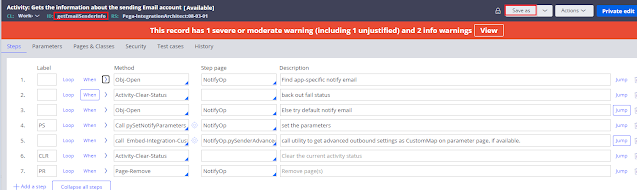

In first step, For pxAccountName provide our email account value, so that Pega will select our email account to send correspondence. 


Save and keep this rule in checkout.


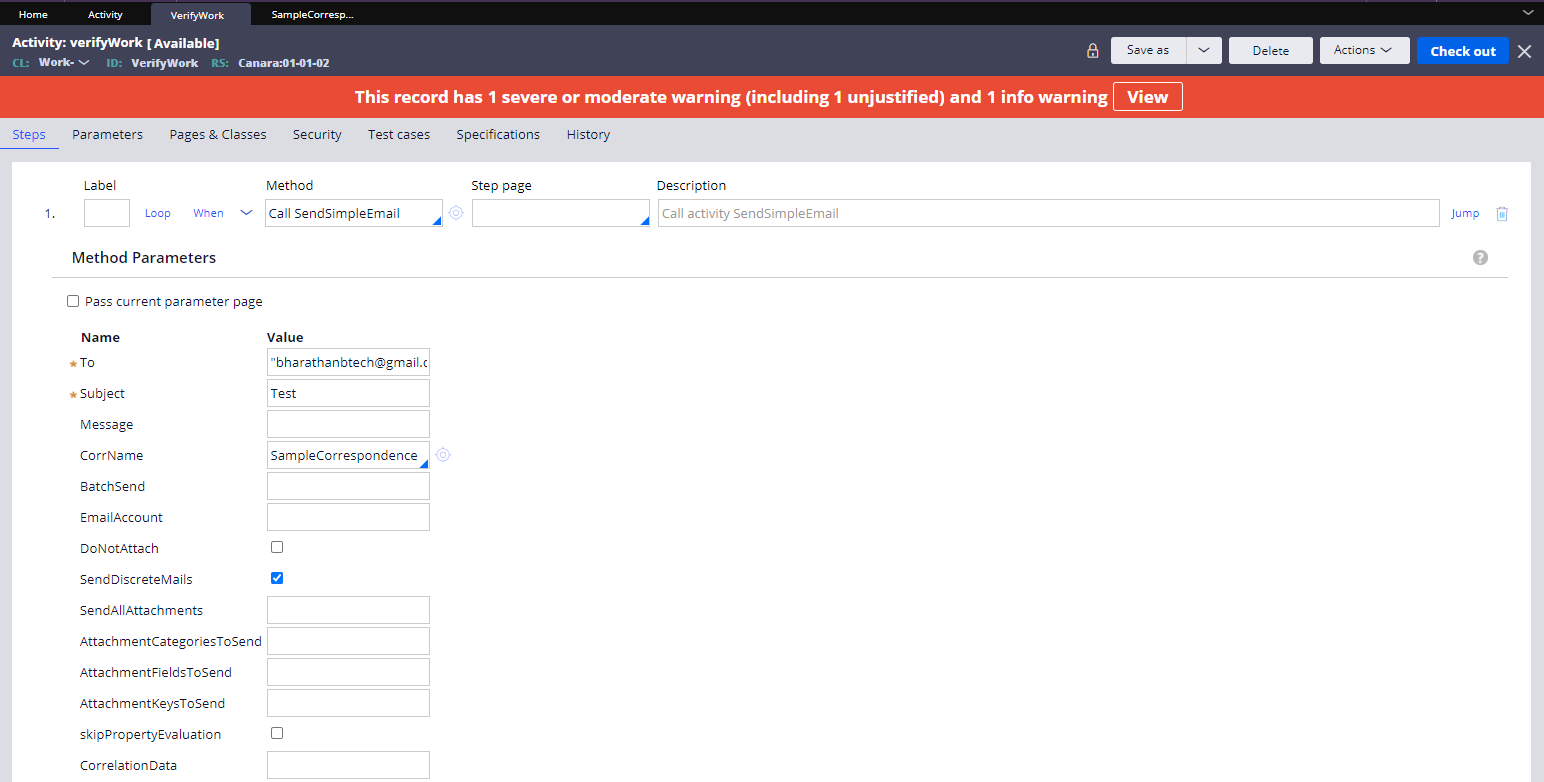
Created a sample activity(VerifyWork) to test our work, in this activity called an Pega activity named SendSimpleEmail.

For SendSimpleEmail activity we have to provide necessary parameter to send correspondence
    I have provided

        To - in this parameter we have to provide to address to which we want to send email
        Subject- Here we have to provide the subject for the email
        In CorrName - Provide the correspondence template which we want to send as body for email.
Save the rule.

Sample correspondence rule created for test.


Lets run the activity and check whether email is sending or not.


Activity ran successfully.


Email received to the To address

Email content:


Hope everyone understand this concept , if any doubts ask in comment. thanks.


Sunday, 31 January 2021

Operator ID Basics


Once we launch Pega personal edition, screen will look like this.

next step is to login in to our Pega personal edition, how to do that?

For maintain user credentials we are having a rule type named Operator Id. So for login we need to create operator id.

how to create operator id if we not have a operator id created before?

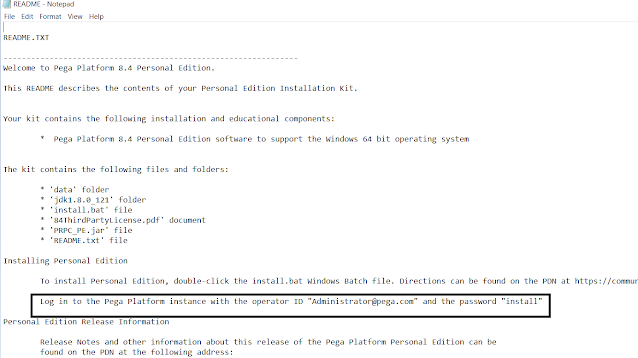
We are having a default operator id provided by pega, we can get this from readme file of personal edition installation jar.


By default , Pega platform application will open.


How to create a new operator id?


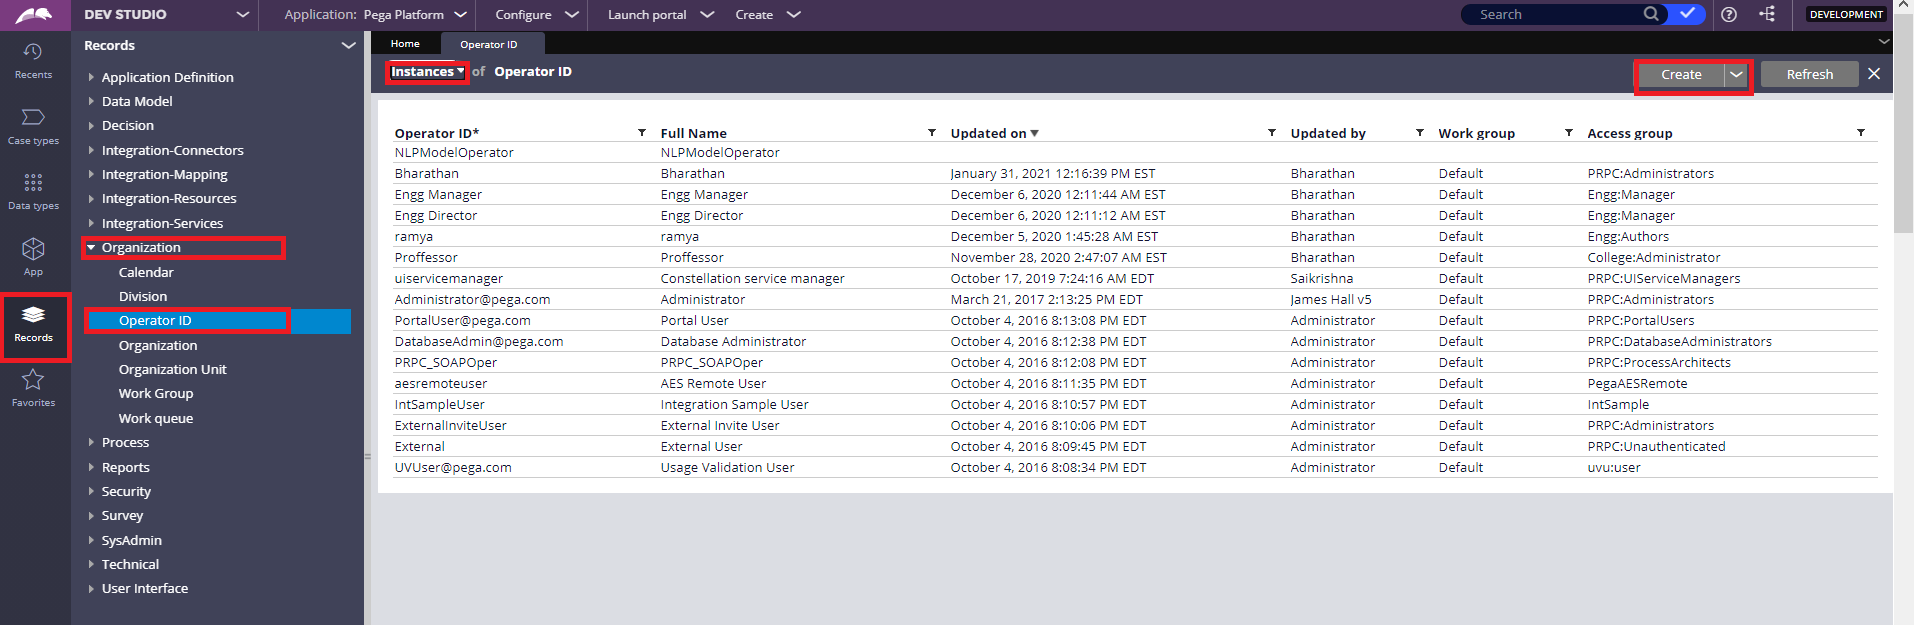
Click on Record explorer -> Expand Organization rule category -> Click on Operator id

            Once we click on Operator id , in right side a screen will display . In the screen, all the existing operator id will display. 
    
        If we wants to create a new operator id click on Create button at Upper Right corner.


In create new operator id window, provide the username and description and click create and open to open the new operator id rule.


In profile tab, select the access group.

    Access group defines which application this operator belongs to and the portal to open for the user.
 
As of now , we have mapped PRPC: Administrator, this will open pega platform application to user on login.

We will see more about access group in upcoming lessons.


In security tab, by clicking on update password provide password for the user.


In work tab, select the organization, division and Unit the operator is belongs to.

As of now we have selected default org, div and unit.

we will discuss more on this topic later.

Save the rule


Log off 


Log in with the created credentials


Pega Introduction

Pega: 

Founded in 1983, Pega is a Business Process Management tool. It is developed on Java and uses OOP and java concepts. And the big advantage is we don't have to have to build the system from the scratch like any conventional programming.


What is BPM?

Business process management (BPM) is a methodology to manage processes and workflows in an organization. The goal of BPM is to increase efficiency, performance, and agility in the day-to-day operations of a business.

Industry Using Pega:


Certifications In pega: https://academy.pega.com/certifications

we are trying to learn about System architect.


Friday, 22 May 2020

Declare Trigger Rule in Pega

Hi Friends, today we will see the use of declare trigger rule in Pega.


I have a class TGB-HRApps-Work-Candidate, In this class I have created some cases(C-1,C-2 and etc..). 

If Anyone delete any case(assume C-1)  I wants to see information like operator who deleted the case and pzInsKey of the case.

How we can achieve this? 

We can configure declare trigger rule , which will trigger whenever a instance is delete in the class. 

In  trigger activity we can add steps to save those details.

Lets do this practically

In below image we can see the list of case id available in candidate class.

Instance of Work class
.
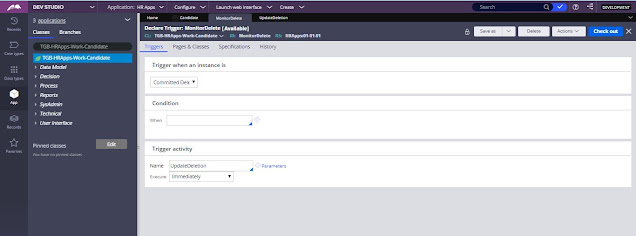
In the same class I am creating a Declare trigger rule.

Declare trigger rule creation

From the list of option available , I am selecting Commited Save so whenever I am doing delete and commit this declare trigger rule(MonitorDelete) will trigger. 

Declate trigger option

When try to save a error message displayed . It is mentioning that Trigger activity is not of type trigger.

Declare trigger rule error

    Updated the activity type to trigger.
Declare trigger activity type
Now can able to save the rule.

Rule Saved

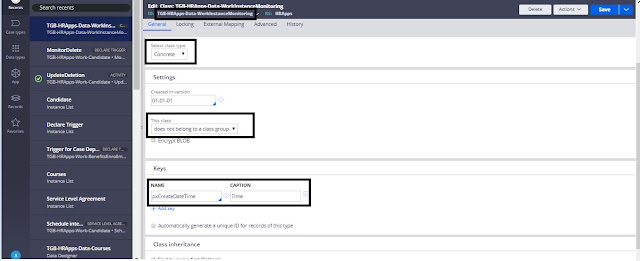
Created a data class to store the deletion details.
data class

Created 3 properties in this class.

data class property creation

Click on the below highlighted button to create local table .
create table button

Added Key for class.

Added Key for class

So lets configure the trigger activity steps. Below is the list of steps in the activity.

Activity steps

Pages and class tab:

pages and class tab

In the property-Set added the data to save to table.


In the first step we are checking whether pxInsKey has values are not. If it has values then only we are allowing to execute the activity.

when condition


Lets check the work we have done.


Created a sample activity to delete the instance.

deletion activity


Ran this activity and traced it.

tracer
In the above image you can able to see the declare trigger was triggered on the deletion and its activity got executed.


In the table you can able to view who deleted and which pzInskey got deleted .

rec


Thank you for reading this post.  If you have any doubts please ask in comment.


Reference:

Pega help file:

Sunday, 17 May 2020

How to Create a new Operator ID using Activity


Hi Friends, today we will see how to create an operator id using an activity in pega. 

Pega has builtin activity named CreateOperator  . This activity has some parameters that is required to create operator id we have to provide those values.

Lets see how to do that.


Created a simple flow, in the first assignment we are getting personal information. In the utility we are generating operator id.

Simple flow

We need to save as Pega built in activity CreateOperator to our application ruleset with different name because this activity has availability Final

And also we have to remove the last 2 steps (show-property) after saved as the activity to our ruleset.
Create Operator Utility


Saved as the activity to my ruleset and changed the name. In the below image you can see I removed two show-property methods.

Create New Operator


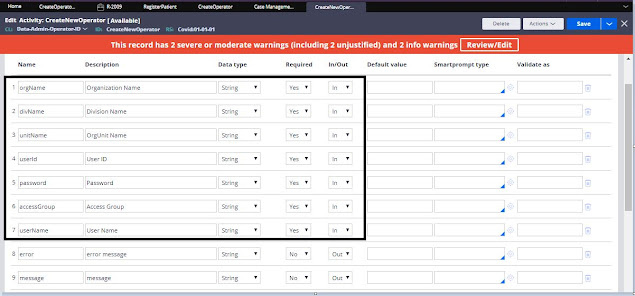
Parameters required to this activity:

We have to provide all the required parameters.
Parameter Tab of Create Operator activity


Created another activity in that I have set all the required parameters below that called the CreateNewOperator activity.

For the CreateNewOperator activity I have enabled Pass current parameter check box so that all the parameters in this steps will flow into that activity.
parameter set


Above activity is the utility that I have called after the assignment in the flow.


Lets run the case and check.

Provided all the details in the first assignment.

Case

First assignment got completed.

assignment completed

So lets check operator id has created or not

OperatorID Instance


Operator Id Created!

Thank you guys for reading , Ask in comment if you have any doubts.