Wednesday 23 October 2019

Ruleset Branching and Ruleset Merging in Pega

Ruleset Branching and Ruleset Merging in Pega


Hi Friends, In this post we will see about the topic Ruleset Branching and Merging.

Ruleset Branching enables developer to work in isolated ruleset without impacting development of other developers who is working in different project.

How it works?

Consider Team A works in enhancement_1 and Team B works in enhancement 2. Both teams are going to work on same application.

Conflicts will come when both team need a same rule to work. So to avoid these problems, Team A will create their own brance ruleset. Team B will create their own brance ruleset. 

Once development has been completed by teams they has to merge their rules which is in their branch ruleset to application ruleset. While Merging rule which have conflicts has to manually compare and fix by both team by their coordination. 

Steps in Ruleset Branching and Merging:

  • Create a development application that is built on the main application.
  • Add the access group for this application to the operator records for the team members.
  • Create the development branches.
  • Create the branch rulesets for the branches listed in the application rule.
  • Perform rule development using the branch rulesets.
  • Use the Merge Branches wizard to merge your branches.
Create New Application involve below steps:
  1. Create each application rule for both Teams(Team A and Team B).
  2. Map Newly created application to the base application(HRApps).

Create a New Application:

Login as administrator, Access group mapped to HRApps Application . We have to create separate application for Team A and Team B


New Application for Team A:


Base Application Mapped to HRApps, and its latest version . Save the rule once modified.


New Application for Team B:


Base Application Mapped to HRApps, and its latest version . Save the rule once modified.


Mapping Branch Ruleset in Application Rule:

Now we can add branch for each seperate application. Created a Branch Named TeamABranch  and save it.


Mapped Branch Named TeamBBranch in Team B application rule and Save rule.


Map Operator Access Group to respective Applications:

Consider Operator_1 going to work on Team A and  Operator_2 going to work on Team B.

We have to map Operator_1 to Team A access group and Operaor_2 to Team B access group.

Creating Access Group for Team A:

Created a new access group named HRApps_TeamA:Administrator and mapped Team A application in it.

Creating Access Group for Team B:

Created a new access group named HRApps_TeamA:Administrator and mapped Team A application in it.


Mapping Access Group to Operator ID:

Mapped Operator 1 to Team A access group, So If I logged in with Operator 1 application for Team A that we created will open.

Mapped Operator 2 to Team B access group, So If I logged in with Operator 2 application for Team B that we created will open.

Adding Branch Ruleset to application:

Click Create branch ruleset to create a new branch ruleset.


Branch Ruleset Creation:

Mapped Team A branch Id to Team A ruleset and we have to provide which ruleset we have to merge after work completion in Ruleset to Branch.


New Branch ruleset created for Team A. Save application rule and we have to similarly login in to Operator_B and we have to create separate Branch Ruleset for Team B 


Saving Rule to TeamABranch Ruleset:

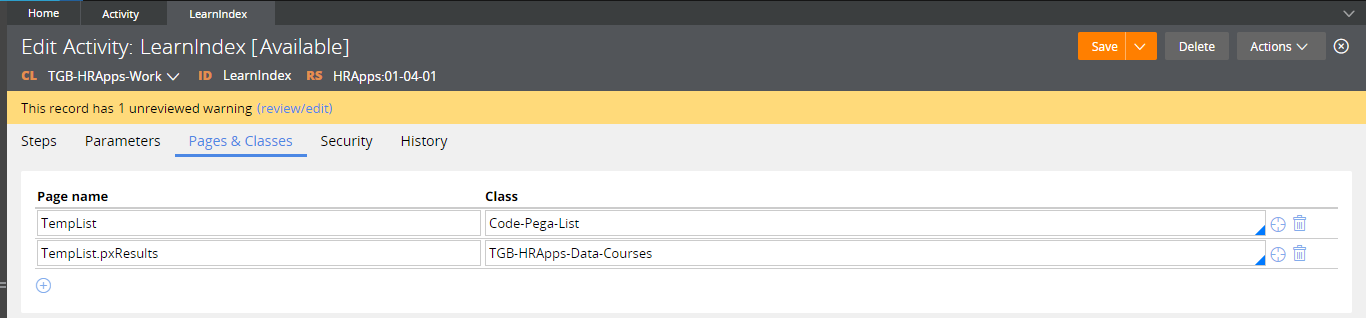
Saved as rule pyGetPerimeter into TeamABranch Ruleset and did  modification in exisiting Rule.


Created a new decision table in TeamABranch. 

Saving Rule to TeamBBranch Ruleset:

Save as the same rule pyGetPerimeter in to TeamBBranch ruleset and make modification in table, so same rule we did saved to both branch . Conflict will arise while merging both rulesets.


Merging Branch Ruleset:

Merging Branch Ruleset will merge the branch ruleset into the base ruleset. Click Merge Branches in Application rule to merge branch ruleset to base ruleset.

Merge Branch Ruleset Wizard:

Wizard will display warning, conflicts in rule merging. Incase conflict came developer have to manually compare the difference then we have to develop in such a way that it should work for both team.


Click Warning or conflict to view the detail about rule merging warning


Merge result shows overview of the merging flow.


Thank you guys for reading this post.  If you have any doubts please ask in comment.

To view detailed explanation about Pega Branching and Merging visit below Pega help.


Thursday 8 August 2019

Index in Pega (Append, Current, Insert, Last, Prepend)


Index in Pega (Append, Current, Insert, Last, Prepend)


Hi Friends, Today we will see how to use Index in Pega.

To Refer PDN Help click here

There are 5 indexes available.

  1. Append
  2. Current
  3. Insert
  4. Last 
  5. Prepend

Append: (Format: PageList.pxResults(<Append>).PropertyName)

     To add an element to Page List or Value List at the end we will use this index. For Example, We have a page list with 5 Pages if we want to add a new page then we will use this index to append a new page .

In the activity created a new page List named TempList .


Each Page of TempList page list refers to Class "TGB-HRApps-Data-Courses".


Save and executed the activity A Page List is created in Clipboard without any pages in it.


In 2nd Step Property Set added logic to append a new page to page list. In that page ID Property we are setting to value 1.


After Executed the activity a new page is appended in the page list so 1st Page created with values.


Modified Step to Append 3 Pages one after one.

After Executed activity , In Clipboard you can see 3 pages created one after one.


Hope understand about Append Index. Lets see Last Index.

Last: (Format: PageList.pxResults(<LAST>).PropertyName)

If We want to add any property values in Last Page, then we  have to use this index.


After Execute activity you can see Description is added in Last Page(3).


Hope understand about Last Index. Lets see Insert Index.

Insert: (Format: PageList.pxResults(<INSERT>3).PropertyName)

We are use this index to add a page at a particular Index. For example if we want to add a page in 4th Place then we have to give like (<Insert>4)

In the below screenshot we are adding a page in 2nd index , In that page we are setting Description as Chemistry.

After Execute the activity, We can see 2nd page is created with Description Chemistry.


Hope understand about Insert Index. Lets see Prepend Index.


Prepend: (Format: PageList.pxResults(<Prepend>).PropertyName)

Use this index to Add a page in First Index. For example, if you want to add a page in first index of the page list then we have to use this index.

Add a step to Add a page in first index with description Physics


A New Page prepended at 1st index with Description Physics


Hope understand about Prepend Index. Lets see Current Index.

Current: (Format: PageList.pxResults(<Current>).PropertyName)


Current functionality is same as i in for Loop ( for(i=0;i<5;i++) , We can refer Current Loop Page property using this index.

If you see below image we are Copying current loop ID value to Param.ID.
 
So When 1st Loop execute the expression will be TempList.pxResults(1).ID
     When 2nd Loop execute the expression will be TempList.pxResults(2).ID
     When 3rd Loop execute the expression will be TempList.pxResults(3).ID
     etc,


Hope understand about all index. Comment me in case of any doubts friends😊

Thursday 25 July 2019

How to import data in excel file to Pega application

How to import data in excel file to Pega application


Hi Friends, in this post we will see how to import data from excel file to pega application using pega built in activity.

Steps to follow:
  • Creating Binary Files Template
  • Create Sample Excel File
  • Creating Rules for Parsing Excel to Clipboard
  • Display Excel in Section
  • Output Demo

Creating Binary Files Template :

Step 1: Create a sample excel file of format (.xlsx) as below


Note : AsianGame() is PageList and GoldMedal,SilverMedal,BronzeMedal - Properties of Integer Type

Step 2 : Create a binary File rule from Tehnical---->Binary File as below image


Step 3 : Provide necessary the Identifier, App Name (Directory) and FileType(.xlsx)

Step 4 : Upload the excel file as created in the step 1 in the binary File

Create Sample Excel

Step 1: create a same excel file of format (.xlsx) as below

Creating Rules for Parsing Excel to Clipboard :


Step 1 : Create a flow as below


Step 2 : Configure the flow action of your flow as below

Step 2.1: AttachingScreen is Pega build-in Section of 


Step 2.2: InitAttachentPage is Pega build-in Activity of Work- Class


Step 2.3: Create a Custom Activity For Mapping Excel to Clipboard


Step 2.3.1 : Custom Activity’s Step 1


Step 2.3.2 : Custom Activity’s Step 2


Step 2.3.3: Custom Activity’s Step 3


Display Excel in Section :


Step 1 : Create a Flow Action as Configured Below


Clipboard View :


Step 2 : Create a Section as configured below


Output Demo:


Step 1:


Step 2 :


Step 3: