Monday, 9 March 2020

How to map a class to a table in Pega


How to map a class to a table in Pega

Hi All, In this post we will see how to map a class to a table.

In below Image you can see the class structure. Under Work class we have Build, Customer, Purchase Request Class.


  •   Build-BuildApp-Work
    • Build
    • Customer
    • Purchase Request


We will create a new table for Purchase Request Class.Right Click ClassName and Select definition to Open Class definition.


Purchase Request is a Concrete Class.


How to know which table this class is mapped to?

By clicking the Test Connectivity we can know which table this class mapped to.


Once we click Test Connectivity a pop-up will open there we can know the table mapped to.

For now purchase request class is mapped to pegadata Schema and the table name is pc_Build_BuildApp_Work table.


I used Postgresql database tool to View my table data.

Link to download pgAdmin 4 :


In pgAdmin website we have demo, which will help us to understand how to Use this software.

We have to provide Host URL then password to login into this software.


Now we will see how to create table in pgAdmin.

We don’t have any option to create table from Pega side. We have to create table from Database tool.

Open the list of Pega table from pgAdmin. DataBase -> Pega - > Schemas - > PegaData - > Tables.


Click on the Work Class(Build-BuildApp-Work) table. After that click SQL tab, there we can see the Create Table sql query. Copy this sql query and paste it in a text editor for some modification.


Changes 1:

Append PurchaseRequest where ever needed.

Changes 2:

Changes 3,4 and 5:


Copy the modified SQL Query and Paste it in Query editor. Run the Query.


Query Executed successfully . So table creation completed.


In Below Image we can see the created table.


Now we have to create a new DataBase table Instance rule in Pega for Mapping Purchase Request class to newly created class.


Create a new Database Table instance.


Select the Database Name. We created our table in PegaData database so select that in drop down.


Provide table name that we created using Database tool.


Save the rule and do test connectivity.


In test connectivity we can see the class is successfully mapped to Newly created table.

Lets create a case in Purchase request class and check whether the created case is displaying in that table or not.

Created flow.


Run Flow.


When run the case a error message displaying. It shows that key is missing . We have to provide key for PurchaseRequest Class.


Provide key in PurchaseRequest class definition and save the rule.


Now issue resolved and a case created.


Lets check the Instance in Table.


We can see the newly created instance in PurchaseRequest table.

Ping in Comment if you have any doubt😊

Thursday, 23 January 2020

Global Search and Re-Indexing Issues

Hi Friends, Sometimes for us search may not work in Pega this is due to indexing issues. Today I saw two Pega videos from Pega PDN Video Library to fix these issues. Below is those URL's.

https://community.pega.com/video-library/global-search-and-reindexing-issues-part-1
https://community.pega.com/video-library/global-search-and-reindexing-issues-part-2

Hope these will help you.

Sunday, 12 January 2020

Why Data Page (or) Declare Page in Pega?

Why Data Page (or) Declare Page in Pega?


What is the use of Data Page and how it works actually? I have this question for long time in my mind. Now I have a clear idea about the use of Data Page.

Lets me share what is the Data Page actually do in pega.

What Declare Expression will do?  When the property refereed in declare expression value is changed then declare expression will trigger.

What Declare On Change will do? When the property refereed in declare on change value is changed then declare on change will trigger.

What Declare Page or Data Page will do ?  When the Declare Page is refereed in any rule at that time declare page or Data page will trigger.

For example,

 Assume I created a data page named D_GetCustomerInfo  .  If I am using this page as step page in an activity step then data page will call and data source will execute.

Hope you understand the concept of Data Page. Lets do it practically.

Concept to implement: Have to load all the previous work items(existing case information) using Data Page.

Created a data page named D_LoadWorkRecords.


Provided Data Source as activity , and I mapped an activity named GetWorkRecords .


In the below image we are browsing all the work id from work table which status is not resolved.


In the Property set we are copying page list from WorkRecords to CaseRecords.


In the Property set we are copying page list from WorkRecords to CaseRecords.

CaseRecords is a Single Page property created in TGB-HRApps-Work class which refer TGB-HRApps-Work.


Now lets refer this Data Page in any activity and check whether data page has value at run time.

In the flow action Post-Processing activity I refereed this declare page.

Pages and Class Tab:

Since we refereed Declare Page on step 3 declare page trigger in step 3 and case data will load here.

Lets trace activity PostCustDetails and check our work.

Flow action completed and activity is get traced.


In the below image you can see In 4th step starting Property set Data page has no values.


In the end of Property set Data Page has values. CaseRecords(1) you can see in below image. So its working fine we can come to conclusion that data page will trigger when we refer the data page in any rule.

Total Number of Records fetched is 45  by data page activity Obj-Browse.

Hope you understand this post. If any doubt please ask in comment.

Wednesday, 23 October 2019

Ruleset Branching and Ruleset Merging in Pega

Ruleset Branching and Ruleset Merging in Pega


Hi Friends, In this post we will see about the topic Ruleset Branching and Merging.

Ruleset Branching enables developer to work in isolated ruleset without impacting development of other developers who is working in different project.

How it works?

Consider Team A works in enhancement_1 and Team B works in enhancement 2. Both teams are going to work on same application.

Conflicts will come when both team need a same rule to work. So to avoid these problems, Team A will create their own brance ruleset. Team B will create their own brance ruleset. 

Once development has been completed by teams they has to merge their rules which is in their branch ruleset to application ruleset. While Merging rule which have conflicts has to manually compare and fix by both team by their coordination. 

Steps in Ruleset Branching and Merging:

  • Create a development application that is built on the main application.
  • Add the access group for this application to the operator records for the team members.
  • Create the development branches.
  • Create the branch rulesets for the branches listed in the application rule.
  • Perform rule development using the branch rulesets.
  • Use the Merge Branches wizard to merge your branches.
Create New Application involve below steps:
  1. Create each application rule for both Teams(Team A and Team B).
  2. Map Newly created application to the base application(HRApps).

Create a New Application:

Login as administrator, Access group mapped to HRApps Application . We have to create separate application for Team A and Team B


New Application for Team A:


Base Application Mapped to HRApps, and its latest version . Save the rule once modified.


New Application for Team B:


Base Application Mapped to HRApps, and its latest version . Save the rule once modified.


Mapping Branch Ruleset in Application Rule:

Now we can add branch for each seperate application. Created a Branch Named TeamABranch  and save it.


Mapped Branch Named TeamBBranch in Team B application rule and Save rule.


Map Operator Access Group to respective Applications:

Consider Operator_1 going to work on Team A and  Operator_2 going to work on Team B.

We have to map Operator_1 to Team A access group and Operaor_2 to Team B access group.

Creating Access Group for Team A:

Created a new access group named HRApps_TeamA:Administrator and mapped Team A application in it.

Creating Access Group for Team B:

Created a new access group named HRApps_TeamA:Administrator and mapped Team A application in it.


Mapping Access Group to Operator ID:

Mapped Operator 1 to Team A access group, So If I logged in with Operator 1 application for Team A that we created will open.

Mapped Operator 2 to Team B access group, So If I logged in with Operator 2 application for Team B that we created will open.

Adding Branch Ruleset to application:

Click Create branch ruleset to create a new branch ruleset.


Branch Ruleset Creation:

Mapped Team A branch Id to Team A ruleset and we have to provide which ruleset we have to merge after work completion in Ruleset to Branch.


New Branch ruleset created for Team A. Save application rule and we have to similarly login in to Operator_B and we have to create separate Branch Ruleset for Team B 


Saving Rule to TeamABranch Ruleset:

Saved as rule pyGetPerimeter into TeamABranch Ruleset and did  modification in exisiting Rule.


Created a new decision table in TeamABranch. 

Saving Rule to TeamBBranch Ruleset:

Save as the same rule pyGetPerimeter in to TeamBBranch ruleset and make modification in table, so same rule we did saved to both branch . Conflict will arise while merging both rulesets.


Merging Branch Ruleset:

Merging Branch Ruleset will merge the branch ruleset into the base ruleset. Click Merge Branches in Application rule to merge branch ruleset to base ruleset.

Merge Branch Ruleset Wizard:

Wizard will display warning, conflicts in rule merging. Incase conflict came developer have to manually compare the difference then we have to develop in such a way that it should work for both team.


Click Warning or conflict to view the detail about rule merging warning


Merge result shows overview of the merging flow.


Thank you guys for reading this post.  If you have any doubts please ask in comment.

To view detailed explanation about Pega Branching and Merging visit below Pega help.


Thursday, 8 August 2019

Index in Pega (Append, Current, Insert, Last, Prepend)


Index in Pega (Append, Current, Insert, Last, Prepend)


Hi Friends, Today we will see how to use Index in Pega.

To Refer PDN Help click here

There are 5 indexes available.

  1. Append
  2. Current
  3. Insert
  4. Last 
  5. Prepend

Append: (Format: PageList.pxResults(<Append>).PropertyName)

     To add an element to Page List or Value List at the end we will use this index. For Example, We have a page list with 5 Pages if we want to add a new page then we will use this index to append a new page .

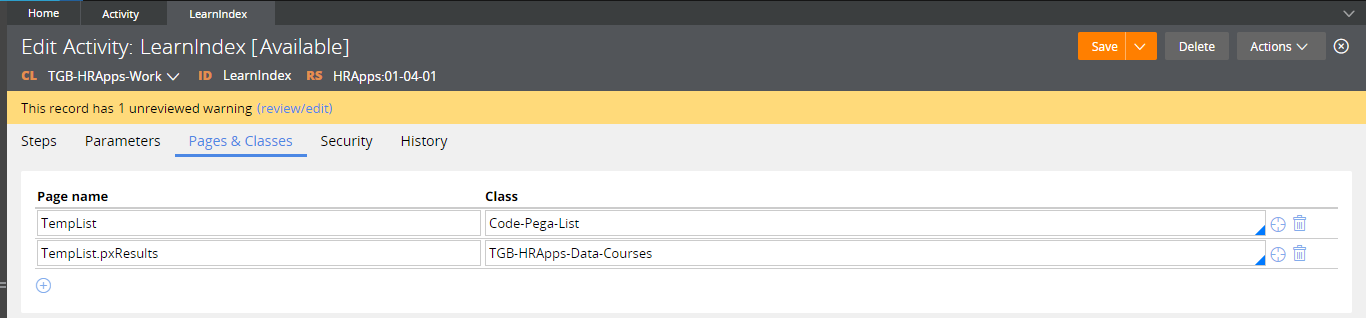
In the activity created a new page List named TempList .


Each Page of TempList page list refers to Class "TGB-HRApps-Data-Courses".


Save and executed the activity A Page List is created in Clipboard without any pages in it.


In 2nd Step Property Set added logic to append a new page to page list. In that page ID Property we are setting to value 1.


After Executed the activity a new page is appended in the page list so 1st Page created with values.


Modified Step to Append 3 Pages one after one.

After Executed activity , In Clipboard you can see 3 pages created one after one.


Hope understand about Append Index. Lets see Last Index.

Last: (Format: PageList.pxResults(<LAST>).PropertyName)

If We want to add any property values in Last Page, then we  have to use this index.


After Execute activity you can see Description is added in Last Page(3).


Hope understand about Last Index. Lets see Insert Index.

Insert: (Format: PageList.pxResults(<INSERT>3).PropertyName)

We are use this index to add a page at a particular Index. For example if we want to add a page in 4th Place then we have to give like (<Insert>4)

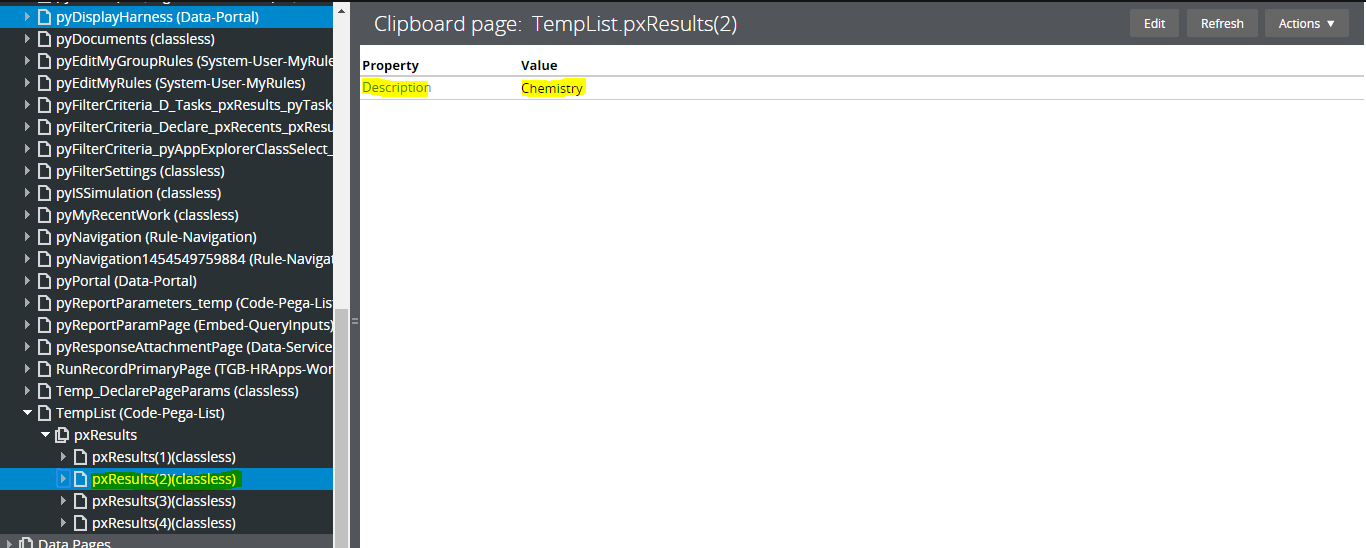
In the below screenshot we are adding a page in 2nd index , In that page we are setting Description as Chemistry.

After Execute the activity, We can see 2nd page is created with Description Chemistry.


Hope understand about Insert Index. Lets see Prepend Index.


Prepend: (Format: PageList.pxResults(<Prepend>).PropertyName)

Use this index to Add a page in First Index. For example, if you want to add a page in first index of the page list then we have to use this index.

Add a step to Add a page in first index with description Physics


A New Page prepended at 1st index with Description Physics


Hope understand about Prepend Index. Lets see Current Index.

Current: (Format: PageList.pxResults(<Current>).PropertyName)


Current functionality is same as i in for Loop ( for(i=0;i<5;i++) , We can refer Current Loop Page property using this index.

If you see below image we are Copying current loop ID value to Param.ID.
 
So When 1st Loop execute the expression will be TempList.pxResults(1).ID
     When 2nd Loop execute the expression will be TempList.pxResults(2).ID
     When 3rd Loop execute the expression will be TempList.pxResults(3).ID
     etc,


Hope understand about all index. Comment me in case of any doubts friends😊